Valve Cover Gasket Replacement
Over the years you may find that your valve covers have gotten nasty and may even be dripping oil. I first became aware of this issue after my car started smelling like oil after shutting off. Turns out oil was seeping out of the valve covers and landing directly on the exhaust header! Not only does it make your car smell horrible but it is a serious fire hazard. Unfortunately with this motor the most difficult part about replacing these gaskets is accessing them at all.
Disassembly
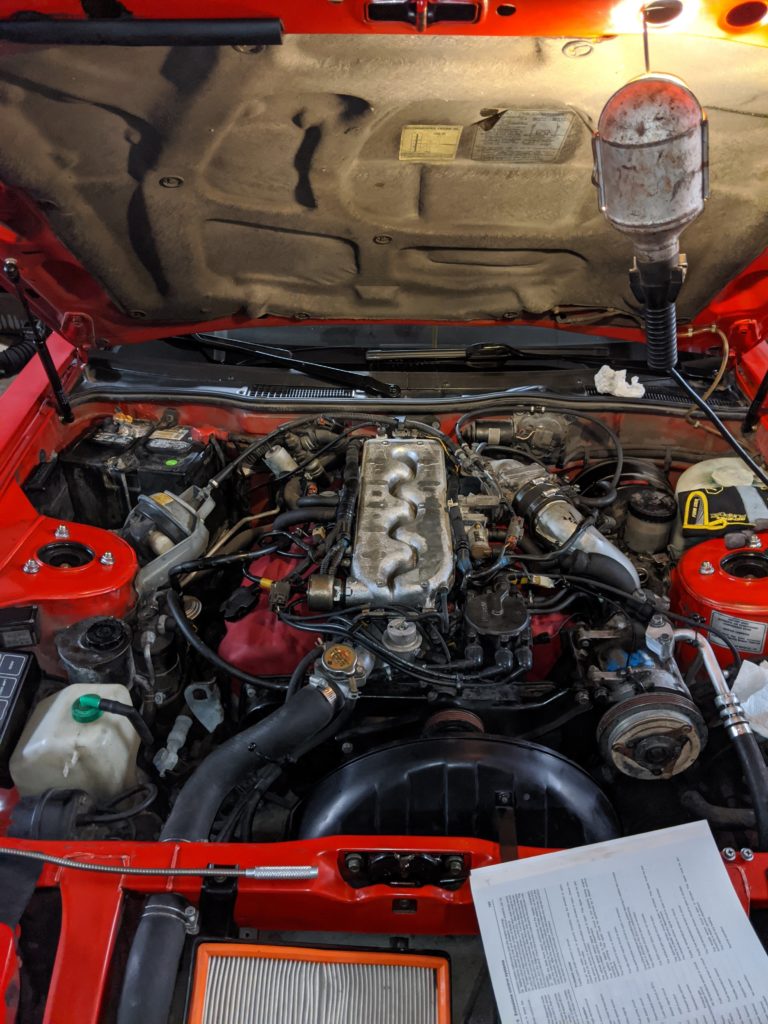
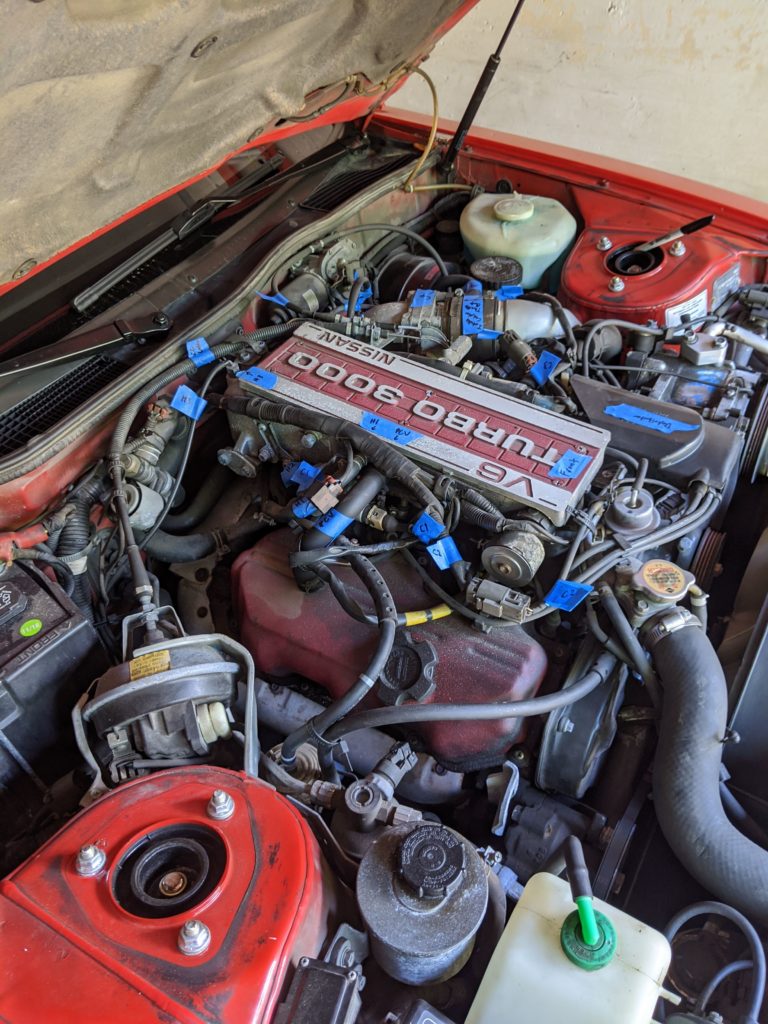
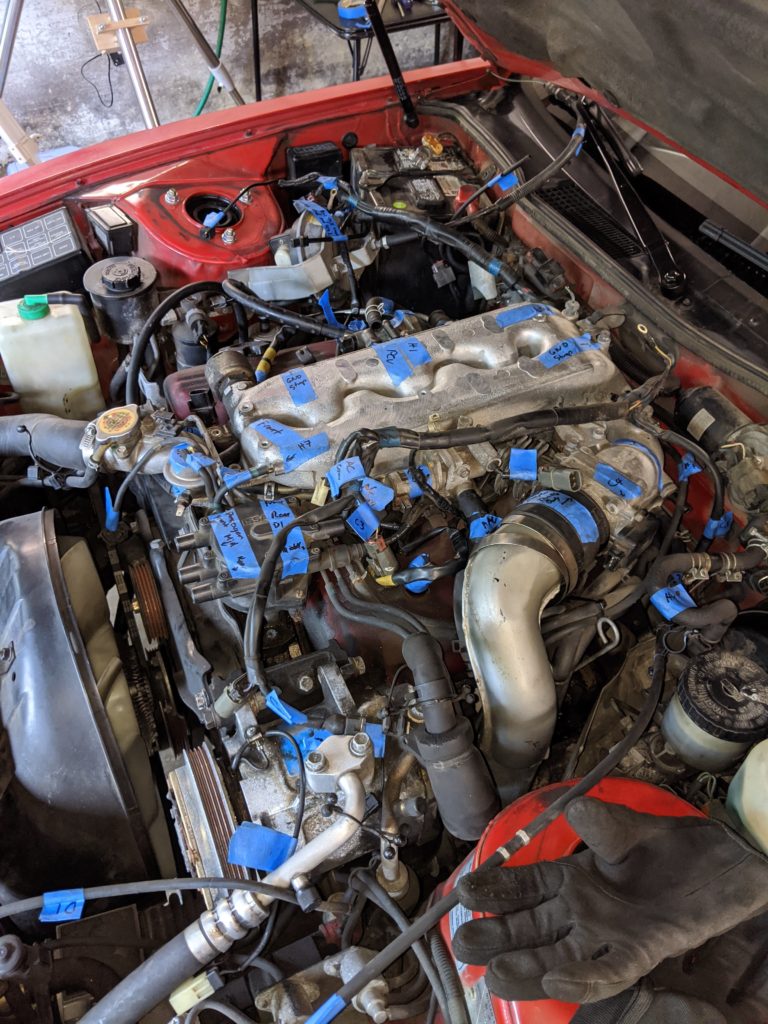
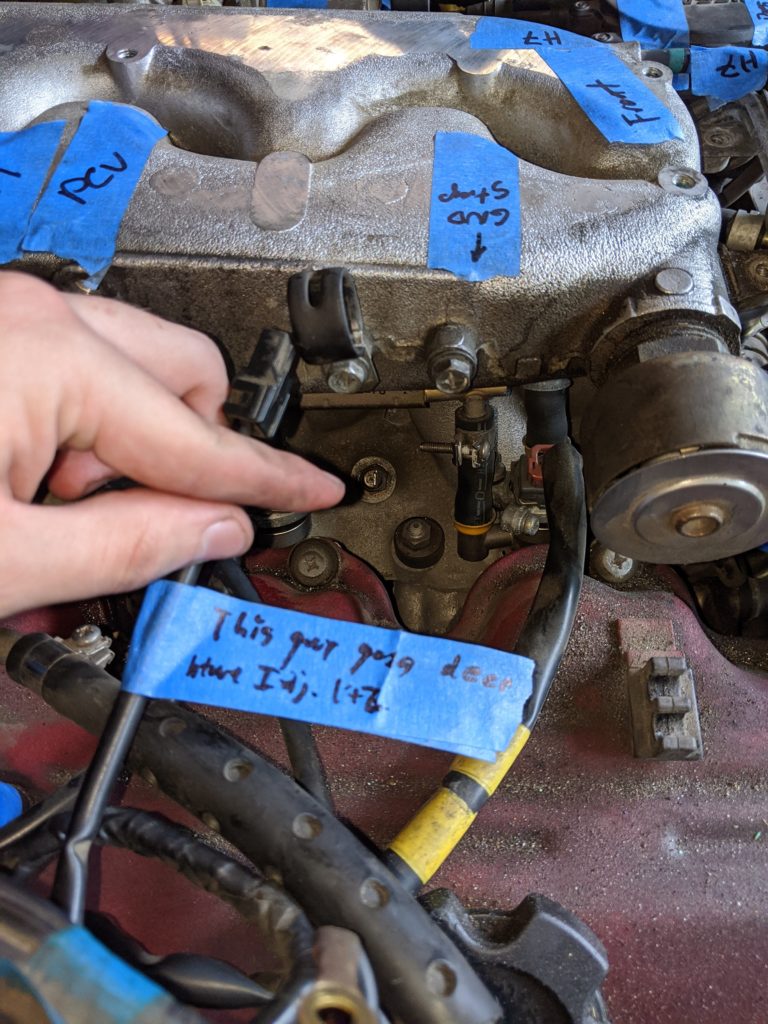
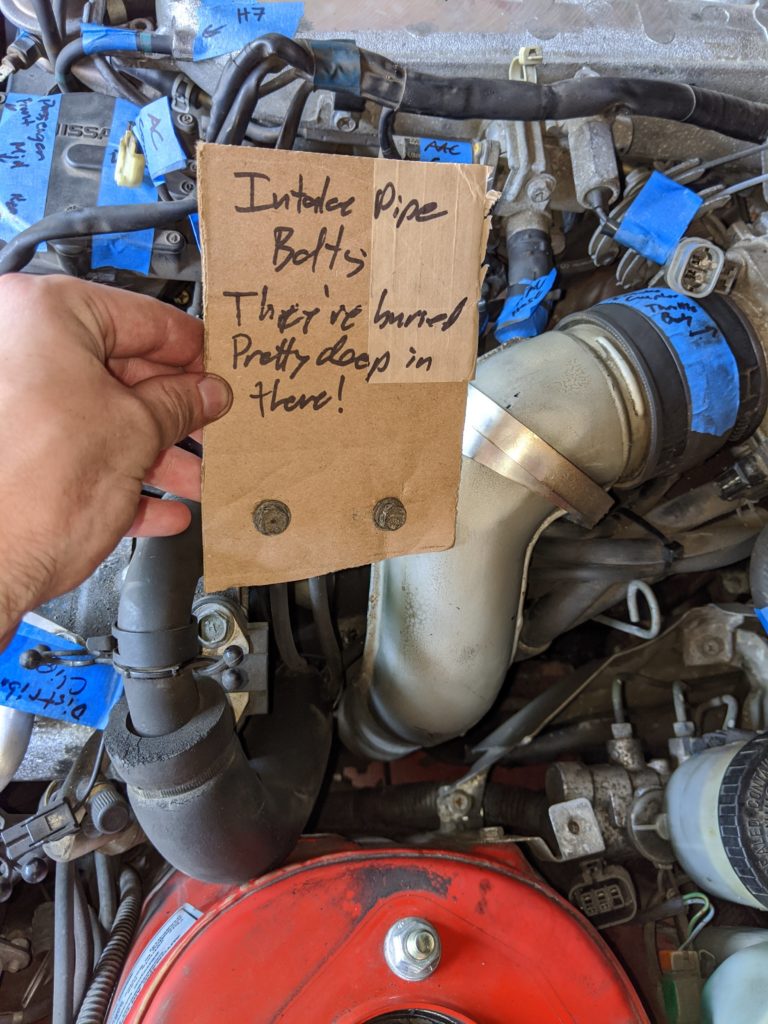
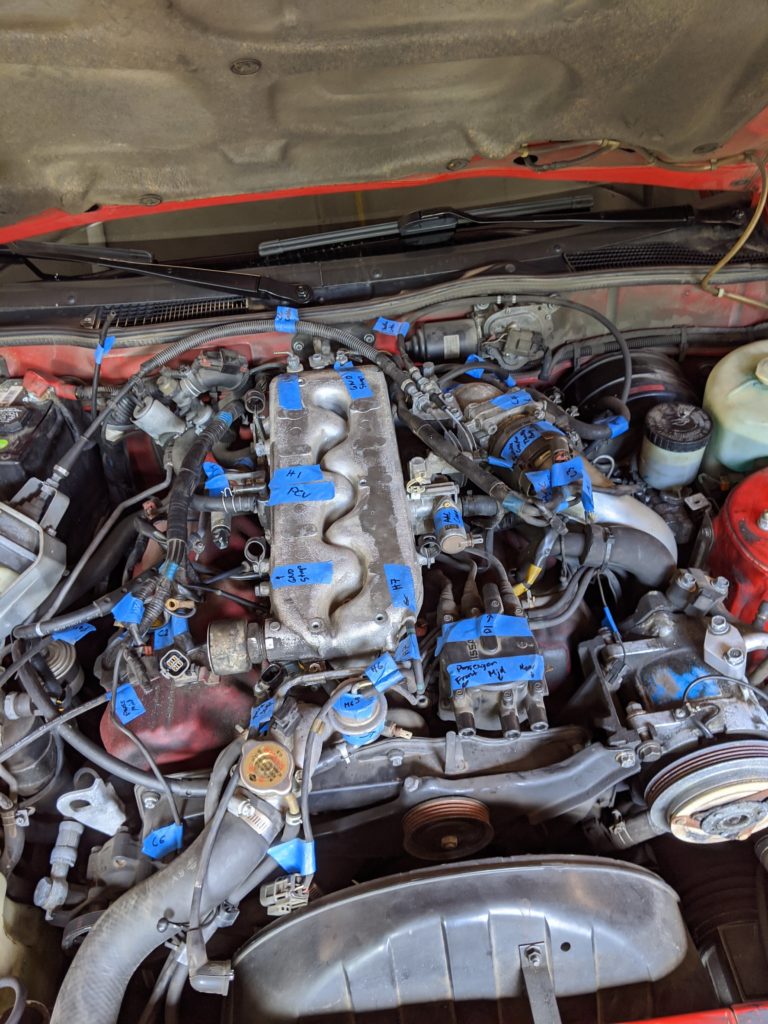
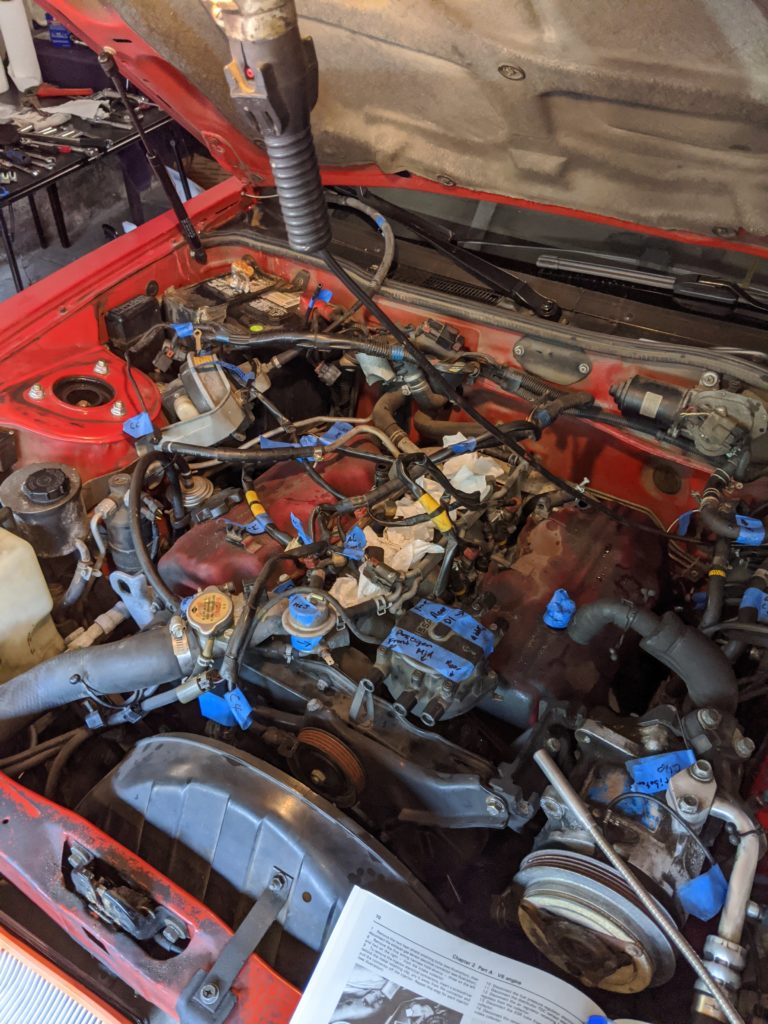
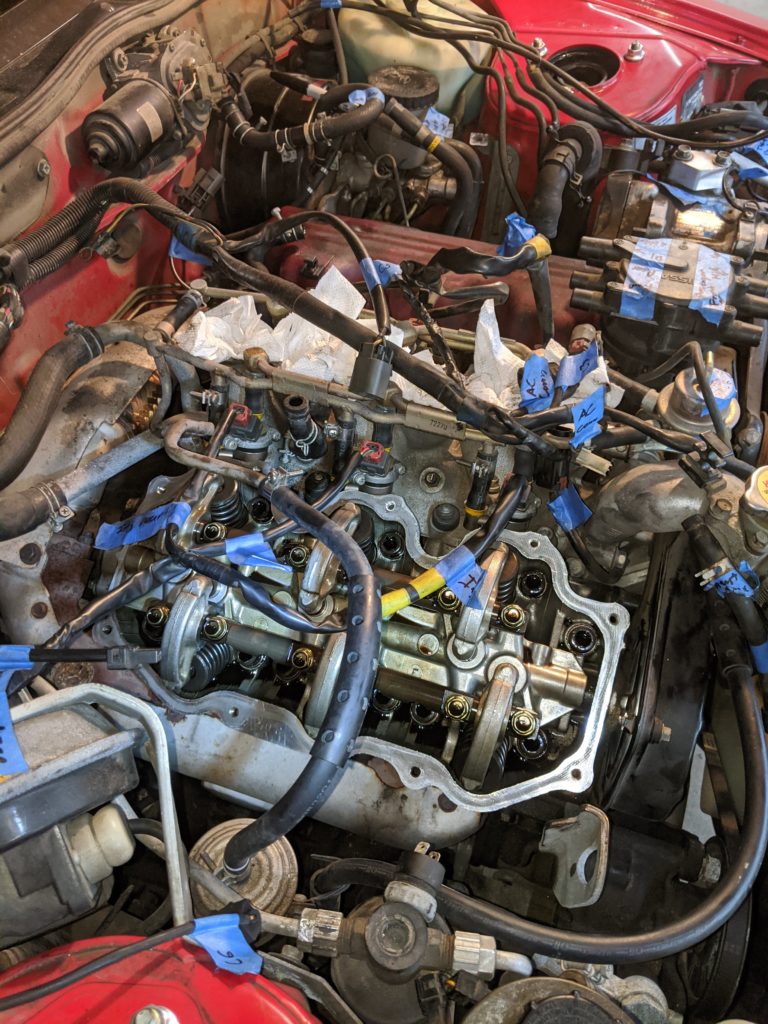
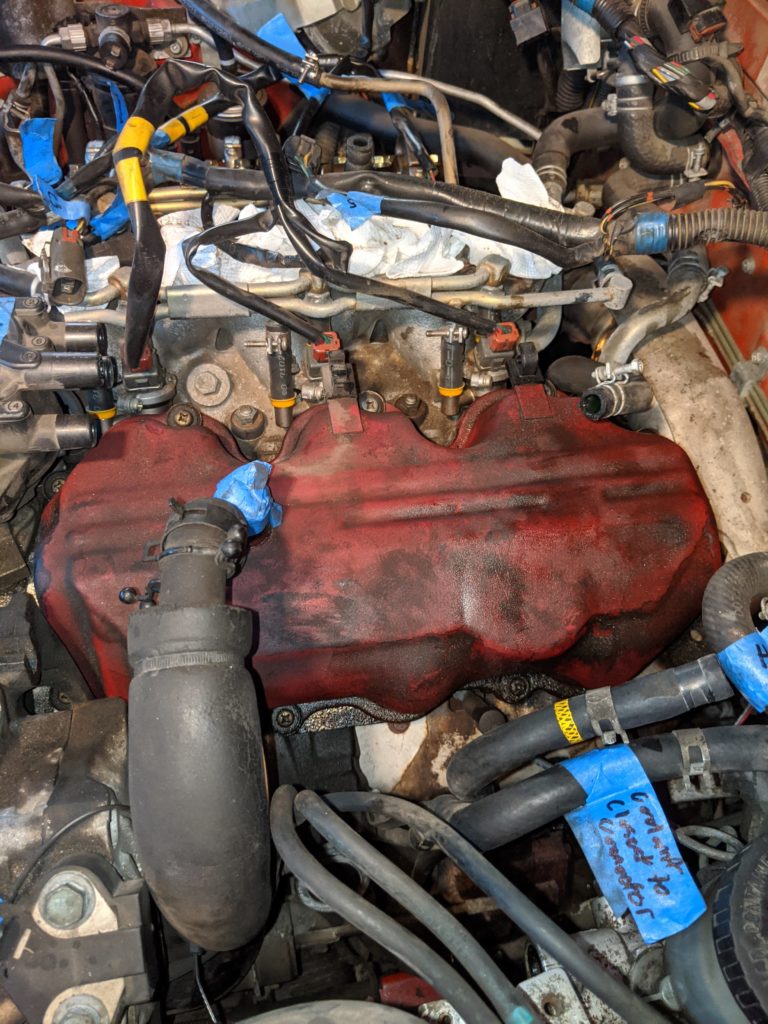
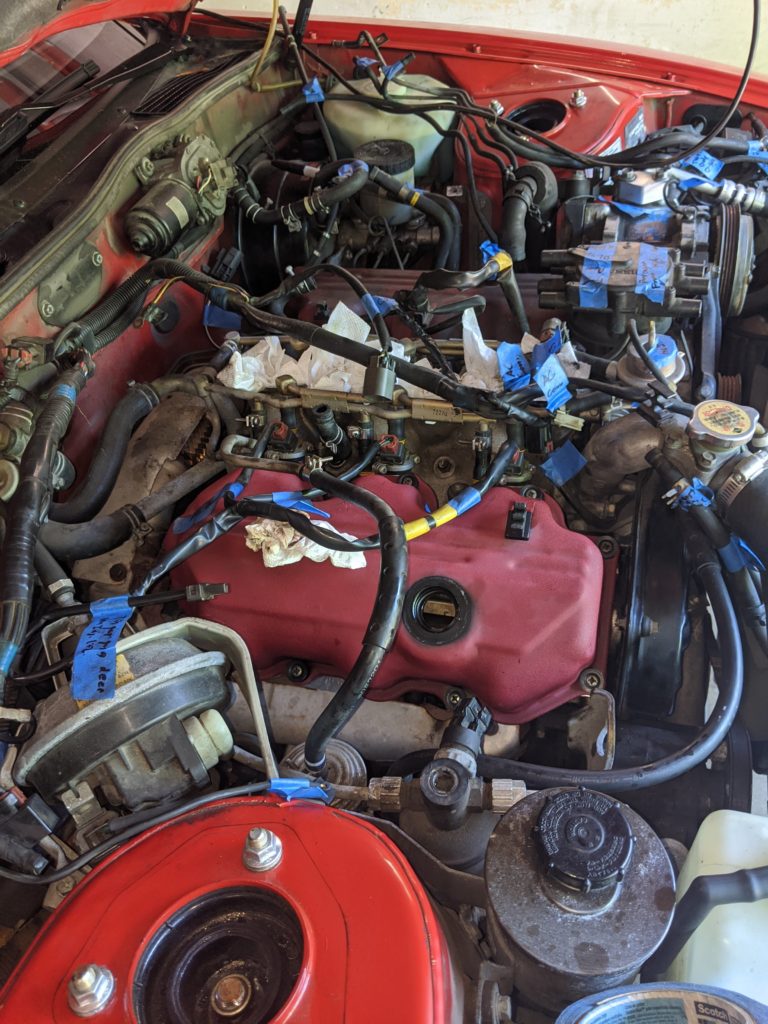
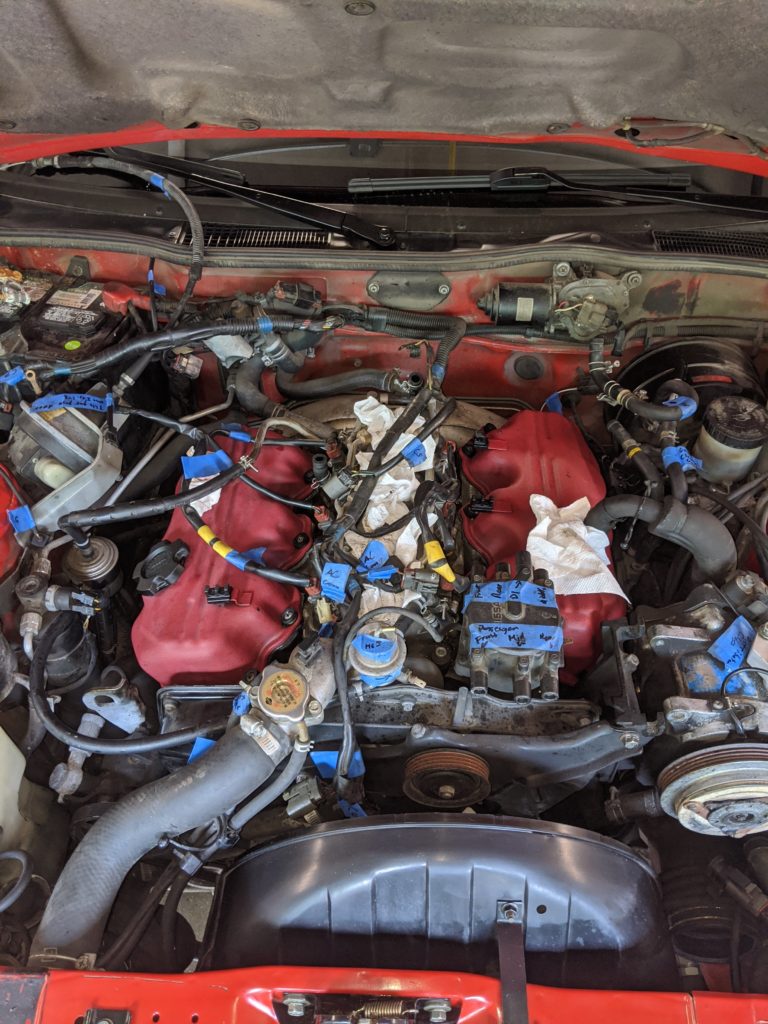
The long and short of it is the entire intake has to come off. If you’re an unfortunate soul like myself with a turbo car you have the joy of wrestling with the charge pipe!!! I won’t bore you with every single connection and hose that must come off because it would be far too many pictures and quite honestly I couldn’t tell you everything that needed to come off even I tried. I cannot stress the importance of labeling and documentation enough. Grab a sharpie and a roll of painters tape and go to town. Mark everything, take pictures of everything and you should be fine. Below are some pictures I took during my disassembly.


A few suggestions to help you in your journey:
- Put every bolt you take off in a piece of cardboard with a written label that indicates their position. Ideally take a picture with this piece of cardboard next to the spot you took them off from as well.
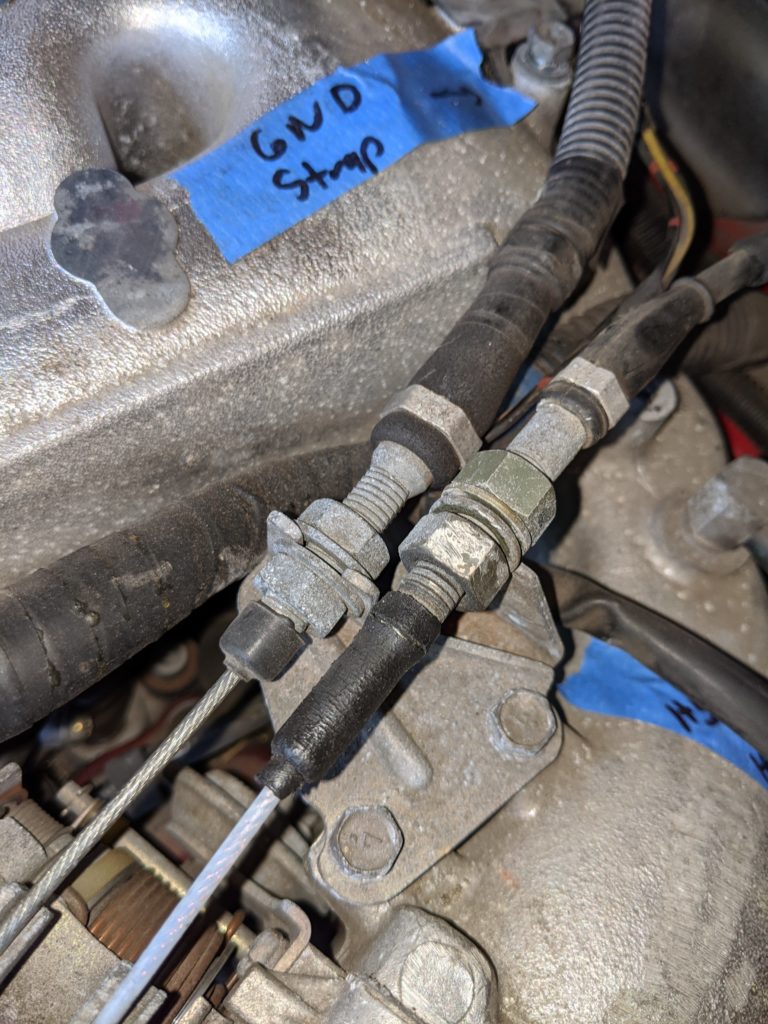
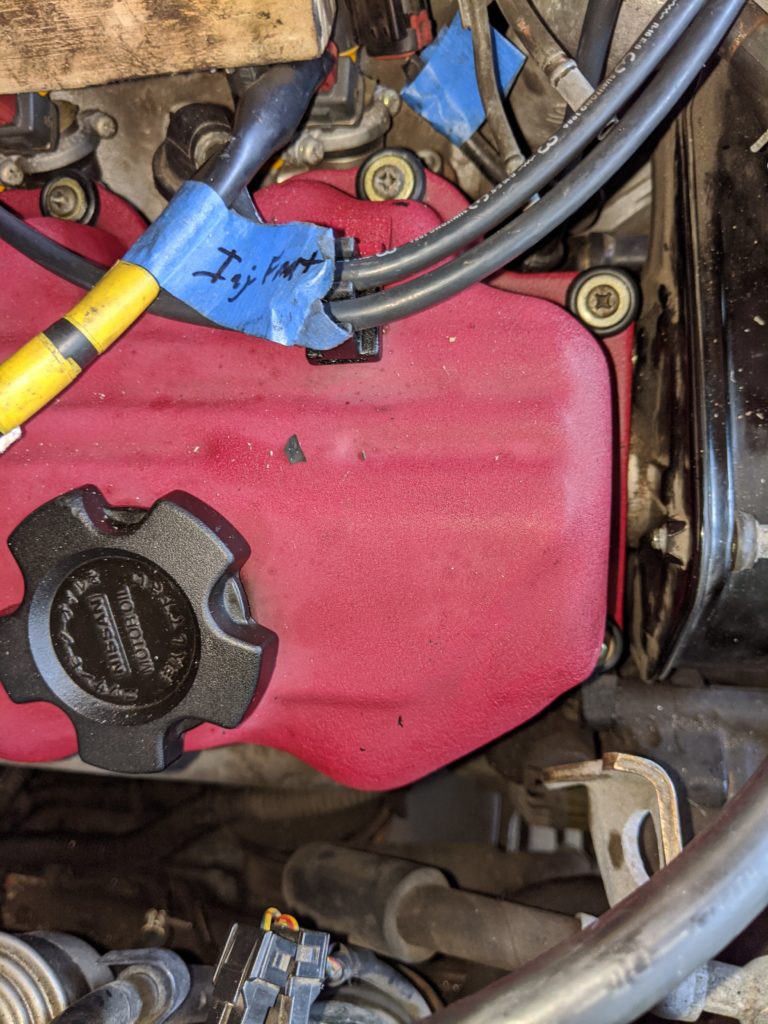
- When removing the throttle cable from the throttle body, remove the entire bracket. I’m stupid and removed both the throttle and cruise control cables individually and had to adjust them reinstalling the plenum.
- There are two bolts holding the charge pipe to the engine block. These MUST be removed before the charge pipe will move at all.
- The charge pipe is seated VERY firmly in place. Once you have removed all bolts from it (including loosening the one right next to the turbo) you will need to muscle that thing off. Unfortunately I don’t hit the gym very frequently.
- I suggest removing all the intake piping and MAF to open up some room in the engine bay. This is a good time to replace your engine air filter as well.
- There has never been a better time to replace your PCV valve and spark plugs.
- Not all plenum bolts are the same. Pay attention to which one goes where and label them accordingly.
The Worst Offender
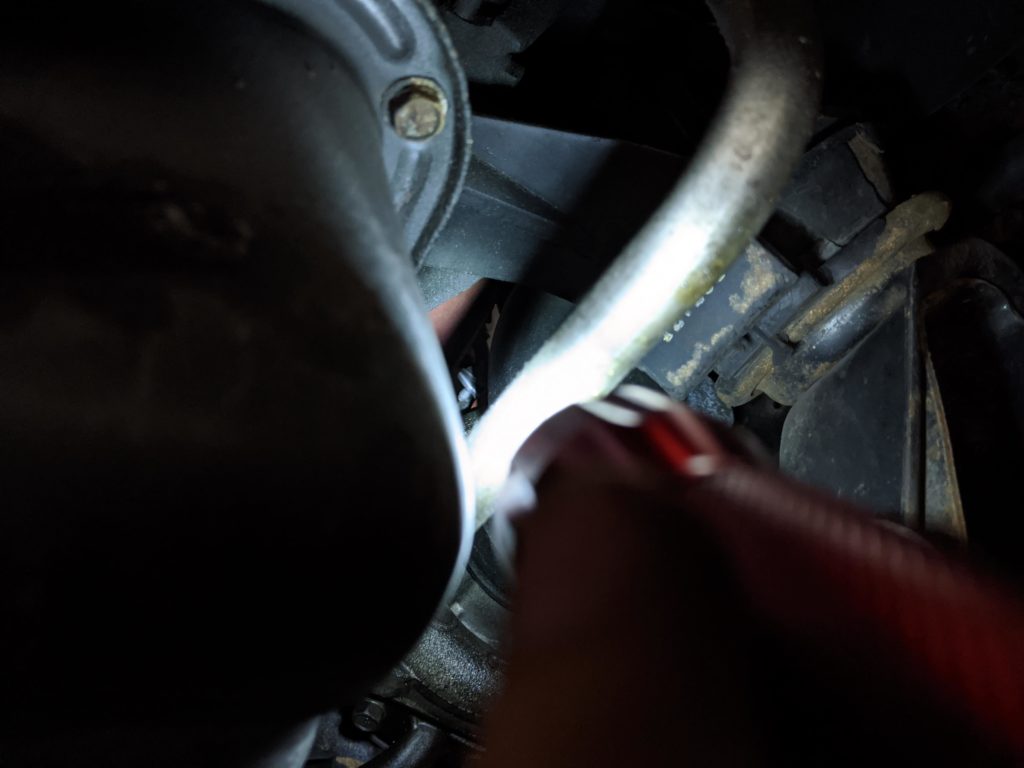
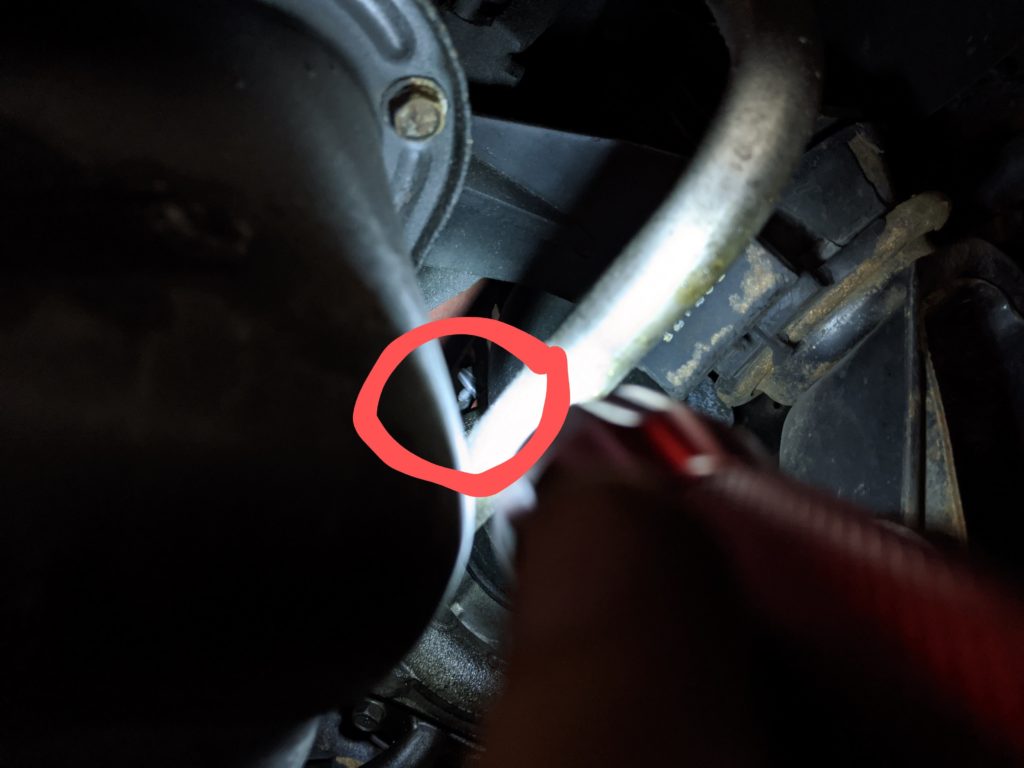
I swear the worst part of this entire process is reaching the bolt which holds the bottom of the charge pipe to the turbo. I was only able to reach this bolt with a flexible screwdriver which involved me sticking my hand up past the sway bar and power steering lines and twisting really hard. I was unable to reach it with a normal ratchet no matter my combination of extensions and U joints. Your mileage may vary. Once this bolt is loosened (it’s a clamp) you can pull the charge pipe off the turbo.
Cleaning Up & Installation
Congratulations! You’ve completed the hard part. If you were diligent with your labeling reassembly will go much faster. With your newfound access to the valve covers you are now able to remove their fasteners. The Philips head screws should come out relatively easy (and probably a little too easily if you were leaking oil). You may find that the valve cover is stuck even with all the fasteners removed. In this case I suggest giving it a few whacks with a dead-blow hammer (or a regular hammer with a piece of wood as a dampener). Just be careful not to dent it, you shouldn’t have to go crazy.
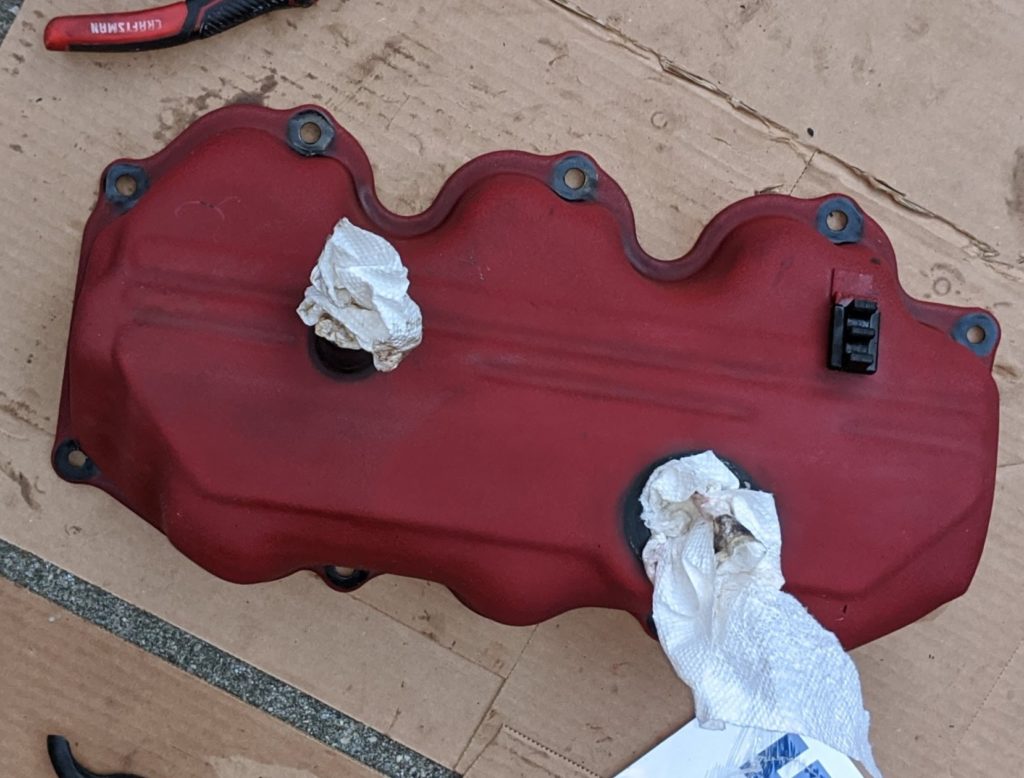

Once the valve covers are separated from the engine you are able to remove the old gasket and install your new one. Take care not to scratch the gasket surface when removing the old one as it may be stuck in places. I was able to remove it with a normal pair of needle nose pliers and some patience. At this point in time you better clean all the dirt and oil off your valve covers or else you will bring bad fortune on yourself and those close to you.
Before installing the new gasket I suggest wetting it with a little motor oil. One thing to note, the new gasket kit I used (Mahle) has the rubber washers installed the other way around when compared to the originals. OEM had the metal washer against the valve cover where as these ones must have the metal washer against the fastener. If you do it the wrong way the screws will sink in to the rubber and lose the tension keeping them in place.
Celebration!
Just kidding, you still have to put the intake back on. I suggest replacing the plenum gasket while you’re at it. Once you’ve done that you can rest easy knowing that you probably won’t have to take the intake off again. Unless you messed something up in which case you did it to yourself, sorry pal. Take some time to clean up your engine bay so you can properly appreciate all the work you just did.